
Getting Started with WritePilot
When you install WritePilot, the app automatically detects your products, allowing you to generate and publish content directly to the corresponding product pages. We recommend following these steps for a smooth setup:
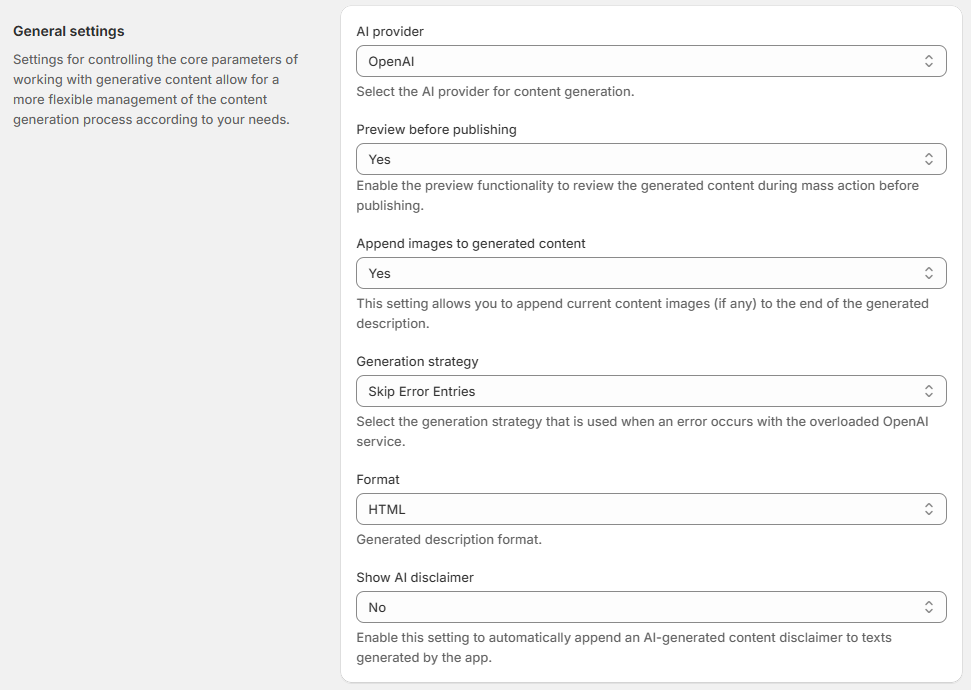
Specify your preferences
1. Open WritePilot and go to Settings.
2. Choose the language for content generation, choose the AI provider, adjust text length, and configure other settings.
Generate content for your products
In WritePilot and go to the Products page.
At the top, you can see small tabs from the SEO content audit showing the number of product pages with missing content. Click Fix to generate content for these pages.
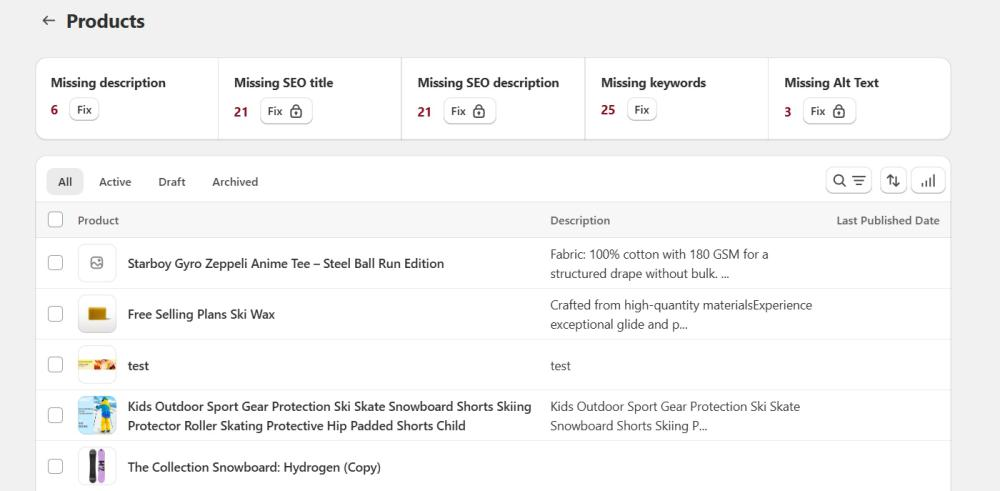
Below, you’ll see a grid of your products. Here you can:
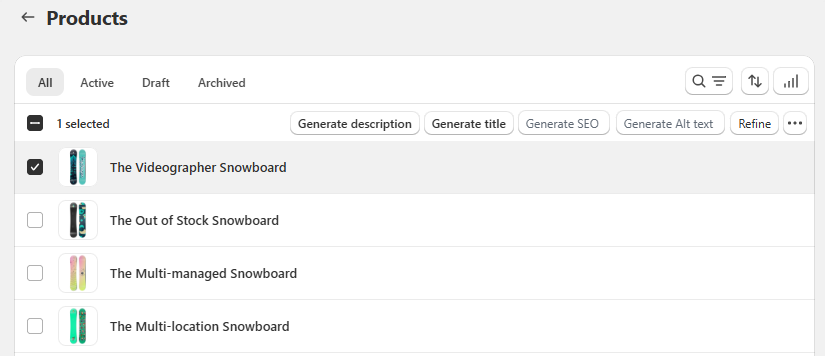
Check products to generate content in bulk.
Enter a specific product to generate content individually for it.
The key difference is that with individual generation, you have more flexibility: you can adjust settings, specify keywords, or add extra details to include in the generated text.
Generate content you need:
Titles
Descriptions
Meta titles
Meta descriptions
Alt text.
For it choose the preferred action:
Generate - uses standard prompt and settings.
Generate with custom prompt - add your own prompt or use our prompt templates - the results are usually more tailored to your business.
Refine - improve the grammar, syntax, and wording of your existing content.
Optionally edit or regenerate it.
5. Publish content.
Generate content for your collections
The process is the same as for generating products content.
In WritePilot and go to the Collections page.
At the top, you can see small tabs from the SEO content audit showing the number of collection pages with missing content. Click Fix to generate content for these pages.
Below, you’ll see a grid of your collections. Here you can:
Check collections to generate content in bulk.
Enter a specific collection to generate content individually for it.
The key difference is that with individual generation, you have more flexibility: you can adjust settings, specify keywords, or add extra details to include in the generated text.
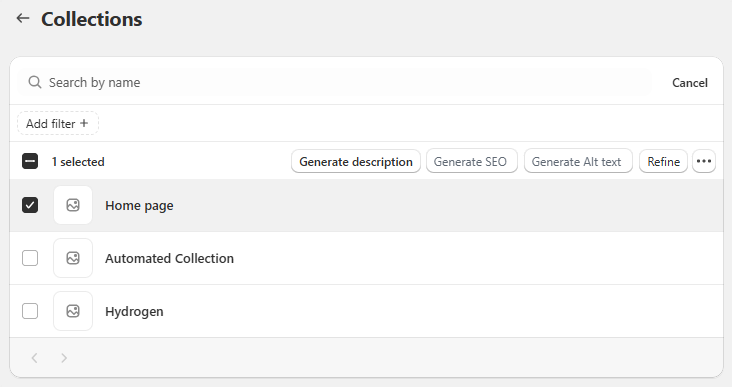
Generate content you need:
Descriptions
Meta titles
Meta descriptions
Alt text.
For it choose the preferred action:
Generate - uses standard prompt and settings.
Generate with custom prompt - add your own prompt or use our prompt templates - the results are usually more tailored to your business.
Refine - improve the grammar, syntax, and wording of your existing content.
Optionally edit or regenerate it.
Publish content.
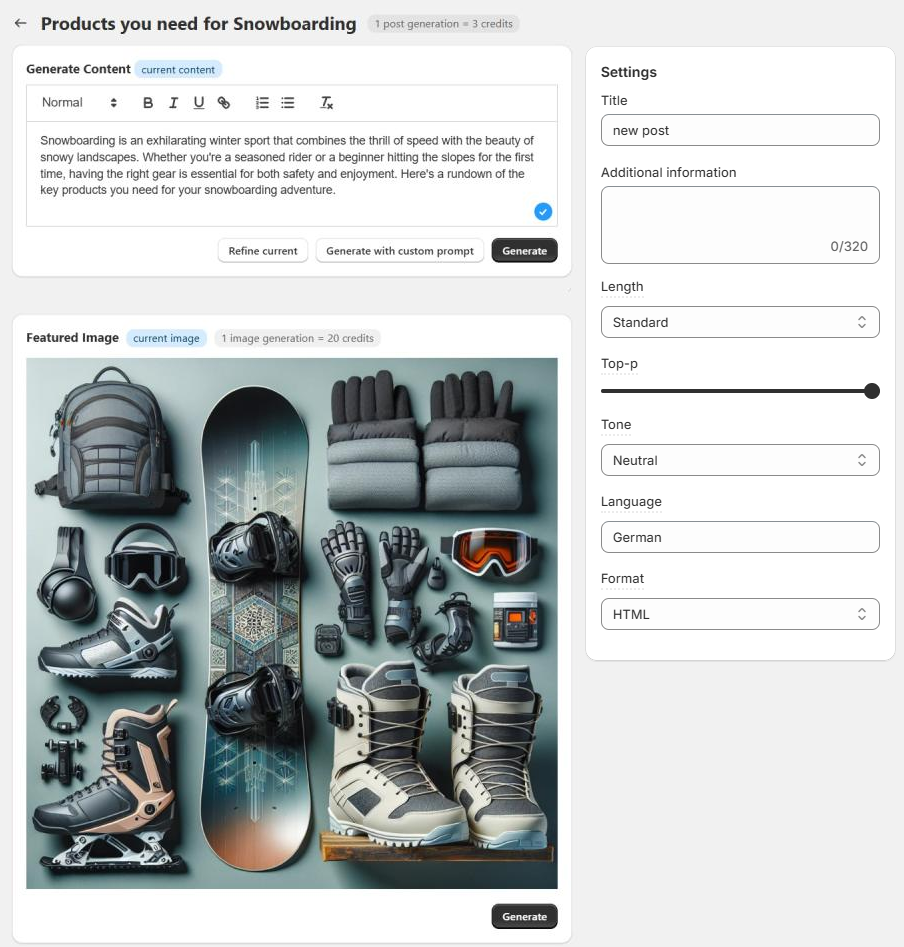
Generate content for your blog posts
On Blogs page, you can generate blog posts and thumbnails to them.
Preparation Before You Start
If you don’t have any blog pages set up yet in Shopify Admin, create one by going to Blog in Shopify Admin (Alternatively, click the Create Blog button in WritePilot). Then create a blank blog post, and return to WritePilot to generate content for it.
WritePilot allows you to generate content for blog posts, but you need to have a blog page and a blank blog post set up first.
Create and Generate Content for Blog Posts
In WritePilot, go to the Blogs page.
Open blog page > select newly created blog post (made during the preparation step).
Generate content with one of the actions:
Generate - uses standard prompt and settings.
Generate with custom prompt - add your own prompt or use our prompt templates - the results are usually more tailored to your business.
Refine - improve the grammar, syntax, and wording of your existing content.
Optionally, create a featured image for your blog post.
Save changes.
If you're not satisfied with the result, simply click Regenerate or Regenerate with a custom prompt to try again.
Here’s how credit usage is calculated for generation:
1 post generation = 3 credits
1 refine = 6 credits
1 image generation = 20 credits.
If you have questions, feel free to contact us at [email protected].